BitAddress (https://bitaddress.org) is a simple open-source wallet that lets users create BTC paper wallets. It ensures safe and secure crypto storage both online and offline. It is very easy-to-use and perfect for newbies as well as pros looking for a chance to avoid using digital currency storage. Apart from printed private and public keys to handle different types of transactions, the wallet delivers a set of additional features that make it easy to create bulk, split or vanity wallets with just a few clicks.
How Easy BitAddress Wallet Is
This wallet is probably one of the easiest ways to store and process cryptocurrency. Although it comes with support for only BTC coins, it is a good option for beginners to pick up some crucial skills in terms of storing, sending or receiving crypto. What’s more, the system delivers enhanced security, as it is based on generating random private and public keys. Users need them to make different transactions as well as withdraw, transfer and receive cryptocurrency.
In addition, the platform makes it easy to create additional brain wallets that will contain a unique phrase for maximum security. Users may also create several wallets at the same time or have them split depending on the goals and transactions they are going to handle. As a result, BitAddress appears to be a beginner-friendly wallet with some advanced options for experienced users as well.
Setting Up the BitAddress Wallet
Getting started with BitAddress is super easy. All you need is to follow several simple steps and get full access to features delivered by the platform out of the box. The good news is that you do not have to care much about security or manual configurations.
The process is fully automated. All you need is to do the following:
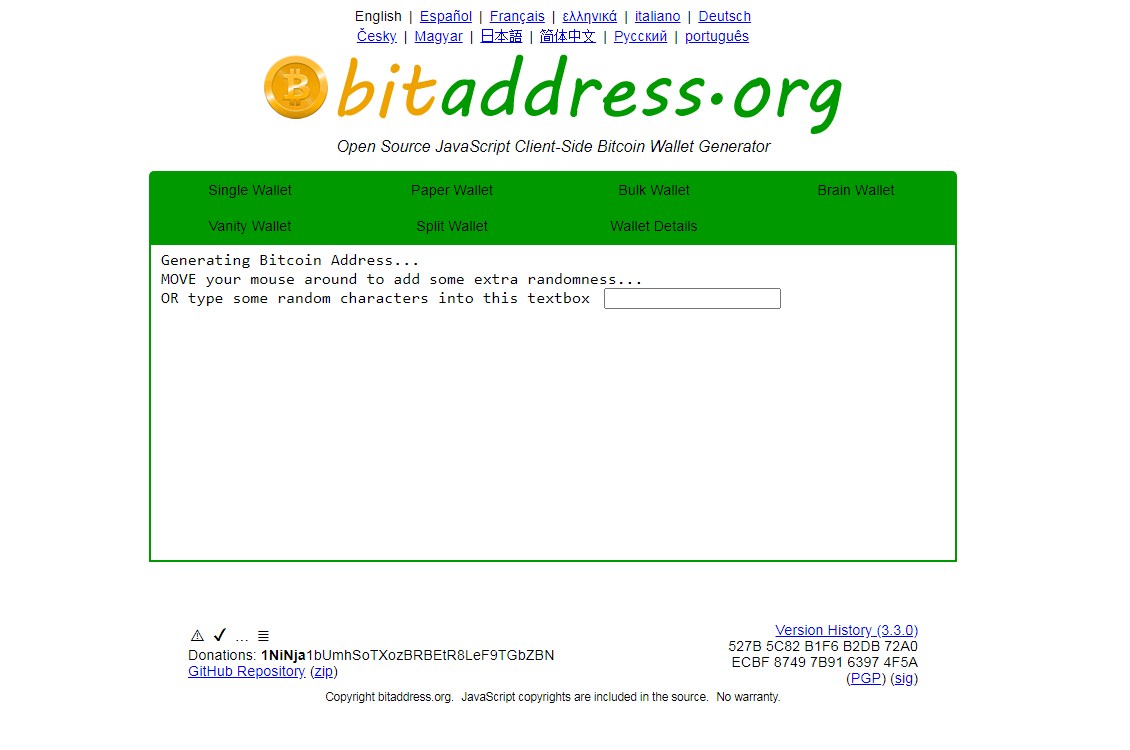
Visit the official https://bitaddress.org website with the open-source software created to produce Bitcoin paper wallets.
Hover the mouse over the screen to generate your first private key. All the data is generated randomly. No need to make up long addresses that are hard to remember. Simply move the mouse and wait until the process reaches 100%. Some users may even find it entertaining.
Once the address and private key have been generated, you can create your first paper wallet and store all coins with the help of a public address.
Now you can see how easy it is to start using the BitAddress wallet. The entire process will hardly take you more than 40 seconds unless you want to dive deeper into advanced features delivered by the system.

The good news is that the platform is able to generate as many addresses per user as possible. Every time you repeat the procedure, you will get a 100% unique new address. It will differ from the one you got previously.
Why Opt for BitAddress Paper Wallet
Before we dive deeper into the process of creating your first paper wallet using BitAddress, we need to figure out why and how we can actually use it. A paper wallet helps to create banknotes or papers that have private and public keys that are linked to a single BTC address. These pieces of paper let users store their coins in a safer way if compared to digital storage. This is mainly because private keys are kept offline preventing the slightest possibility of fraud.
In other words, you get a chance to physically protect your cryptocurrency savings. Every time you want to spend your coins or proceed with other transactions such as sending or receiving crypto, you will need to sweep the private key into a digital wallet. BitAddress itself does not let you send or get funds directly from other users.
Steps to Create BitAddress Paper Wallet
Creating a new paper wallet with BitAddress is very simple. The entire process will take you a couple of minutes. If you are planning to have your coins printed, make sure you have prepared all the necessary equipment in advance.
Step #1 – System Cleanup and Printer
First of all, you need to make sure the device your use (PC, laptop or mobile) is 100% safe. You need to complete a total system cleanup to ensure it does not have viruses. You may opt for any scanning tool you like. Experienced users may opt for more advanced methods to keep their computers safe. Also, get ready with an offline printer. Make sure it is connected and operates properly.
Step #2 – Generate the Keys
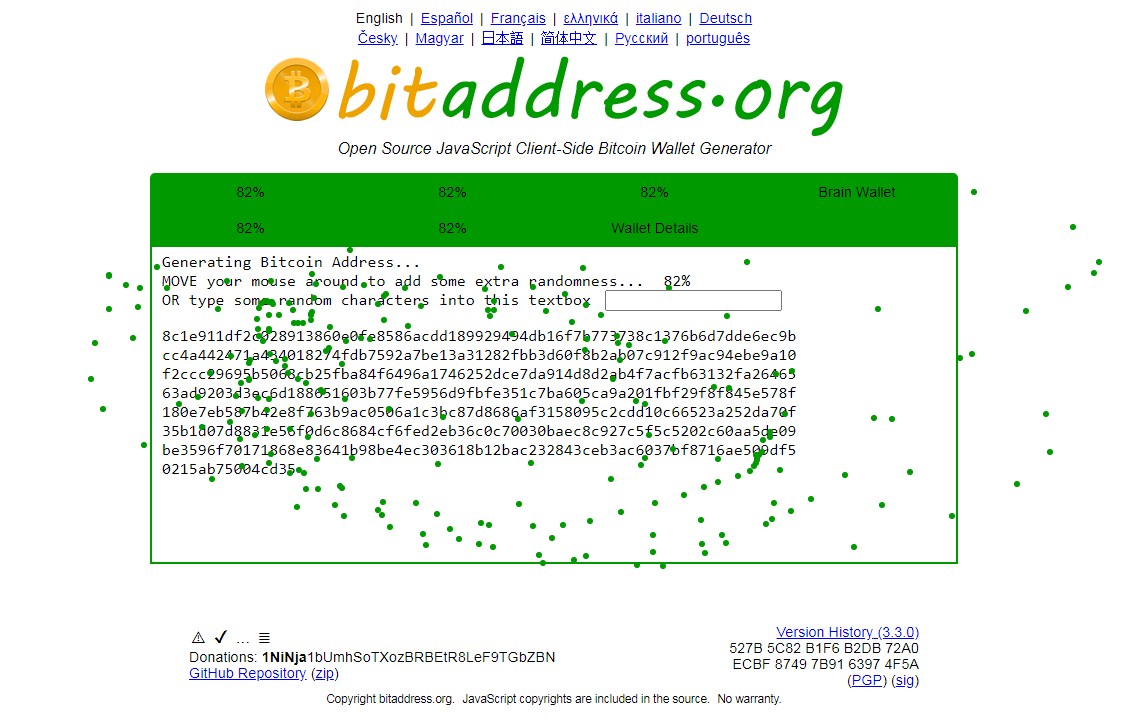
We have already described this stage above discussing how easy BitAddress is. Simply move the mouse across the screen and wait until the system will randomly generate your address along with private and public keys.
Step #3 – Generate a Paper Wallet
This is probably the easiest part. All you need is to click on the Paper Wallet on the upper control panel and have the paper coins ready. Users can configure some of the baseline settings.
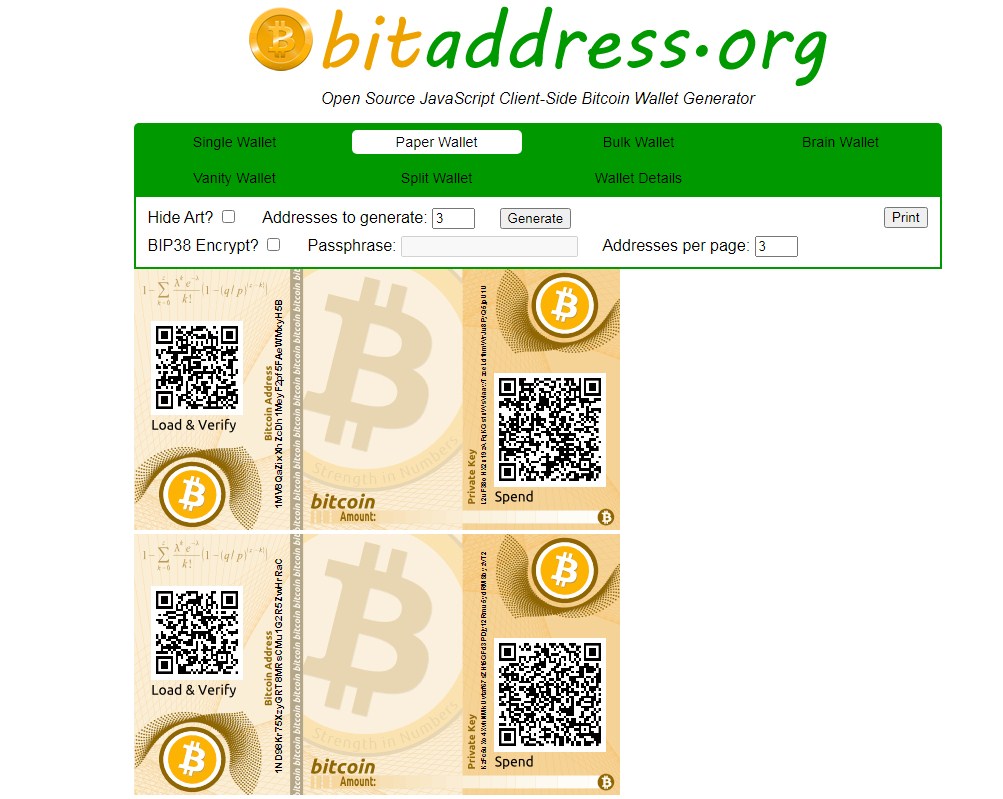
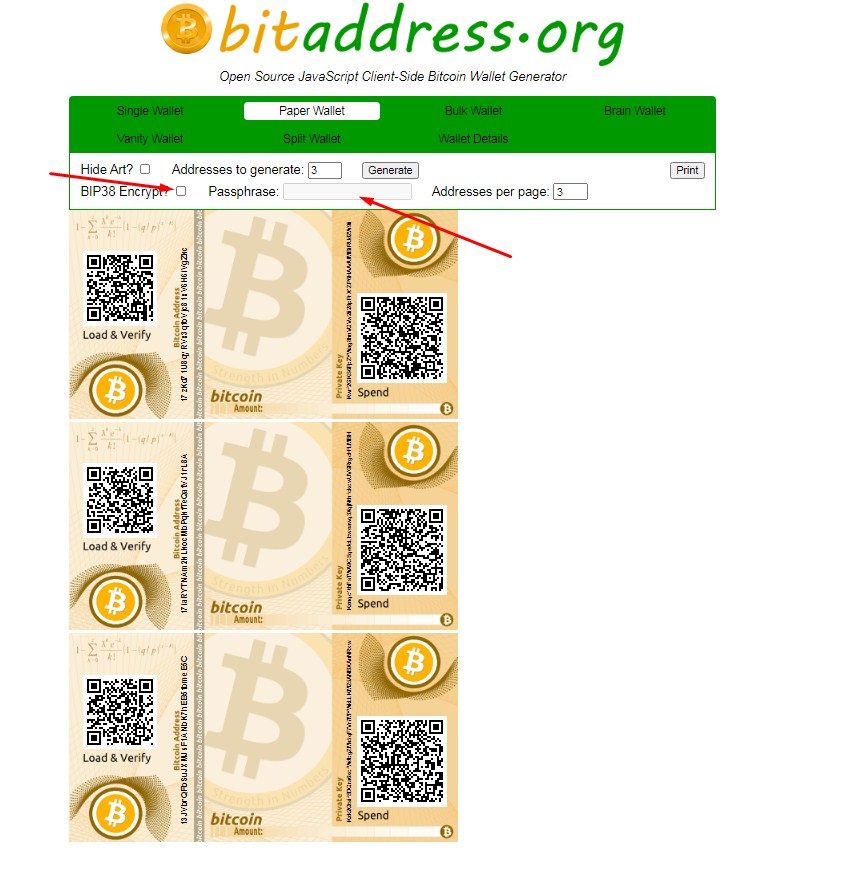
For example, some may want to benefit from enhanced security. In this case, you need to enable BIP38 Encrypt or add an additional passphrase.
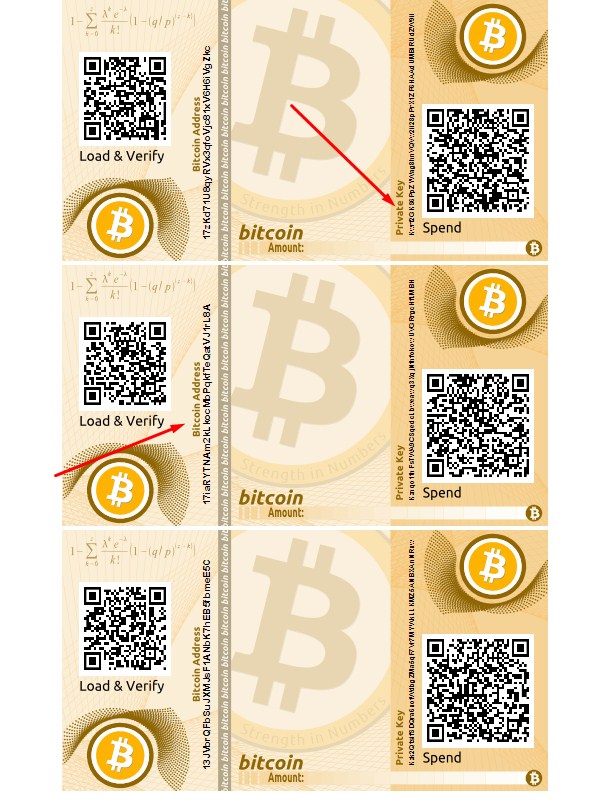
Each piece of paper will contain a public address and a private key. You will need them in order to spend coins, transfer or withdraw them with the help of a digital wallet.
Step #4 – Print your Coins
The last stage is to turn the offline printer on and print your coins. Some experts consider it the safe way, as you do not need to keep your private key and address on third party services. Just make sure your Bitcoin paper savings are kept in a good condition.
The key BitAddress benefit here is the fact that users can easily turn the artwork off. If you need to print more papers, simply repeat the procedure. We recommend deleting files you have downloaded during step #3. You can also clear your cache to minimize the risk of crypto stolen.
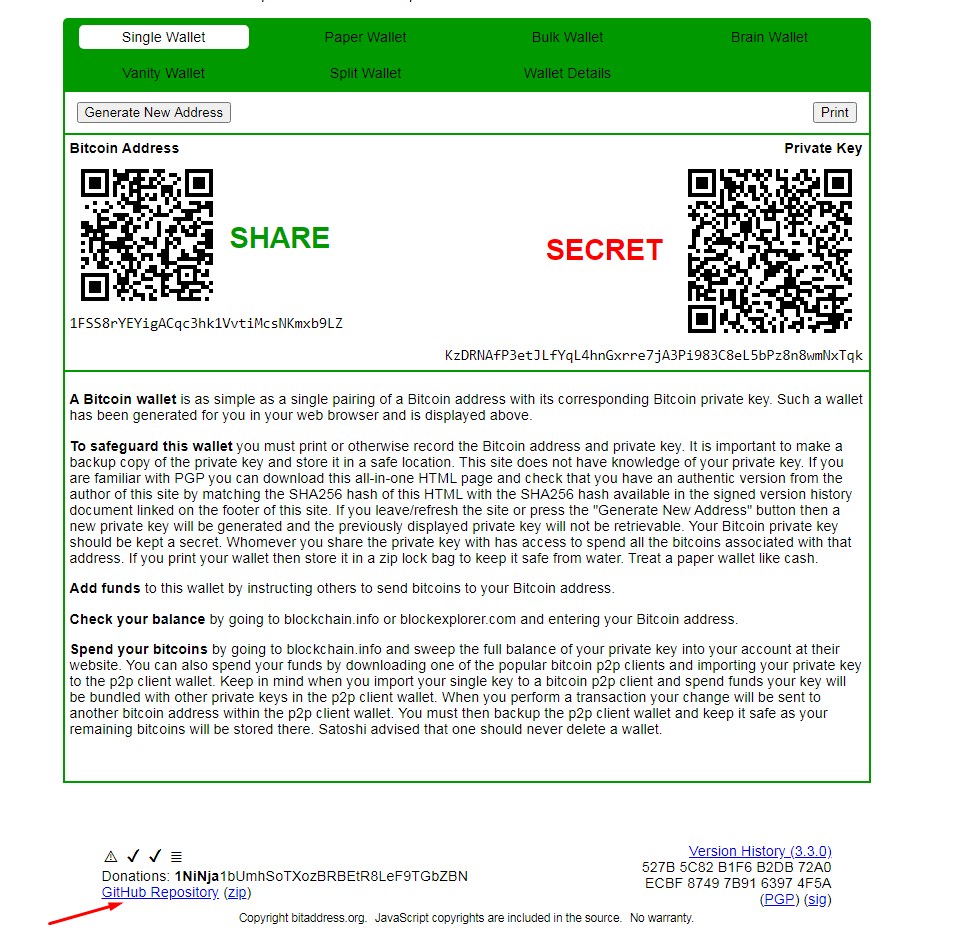
BitAddress itself is one of the safest ways to store coins with numerous security features and even more. If you are obsessed with protection from different kinds of cyber threats, the system lets you enhance wallet security. All you need is to download a copy of the website you use to create a paper wallet. Users will find it at the bottom of the page under the GitHub Repository (zip) name. You need to have them easily accessed whenever you need those files. Also, note that they will be deleted once used. A good idea is to scan the file to reduce the risk of malware or achieve infection.
Note: this step is not obligatory. What’s more, it results in additional actions to take making the process a bit more time-consuming. You can skip it and simply generate a paper wallet right inside the BitAddress interface as described in the step #3.
BitAddress Wallet Features
Unlike other generators that let users create only a single wallet, BitAddress offers advanced options that include additional wallet types.
Bulk Wallet
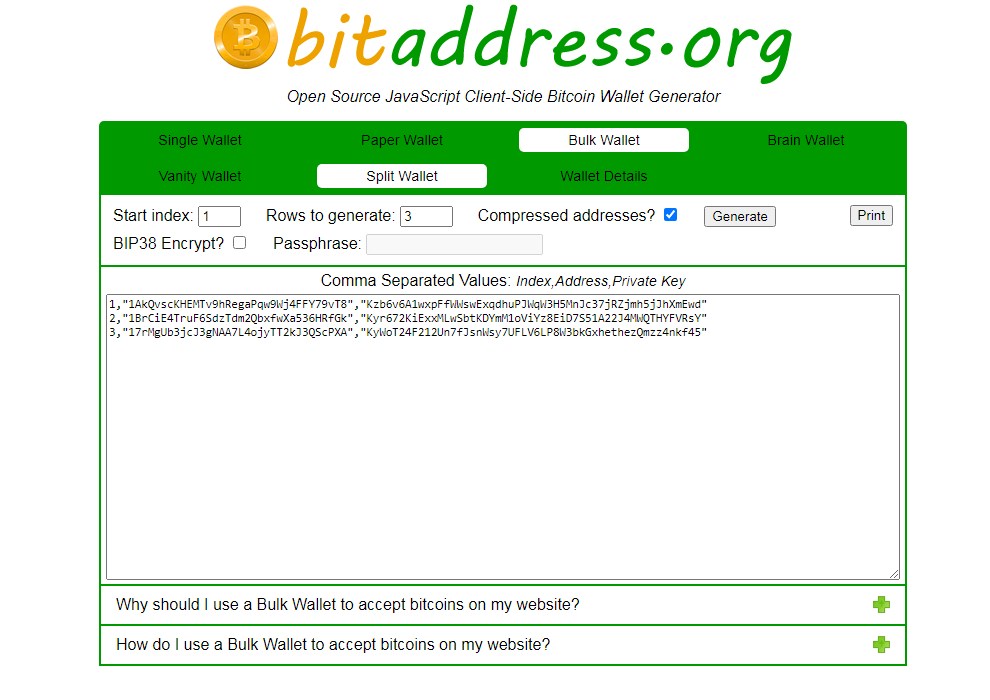
Having a wallet in bulk means that you do not have to keep private keys on a separate server. Users may only upload their BTC address without the need to the official bitcoin client daemon, which is a common way to receive coins (some websites do not have support for daemon). In other words, a Bulk Wallet is a simpler and safer way to handle different transactions or simply store your crypto with minimum chances of being hacked.
Brain Wallet
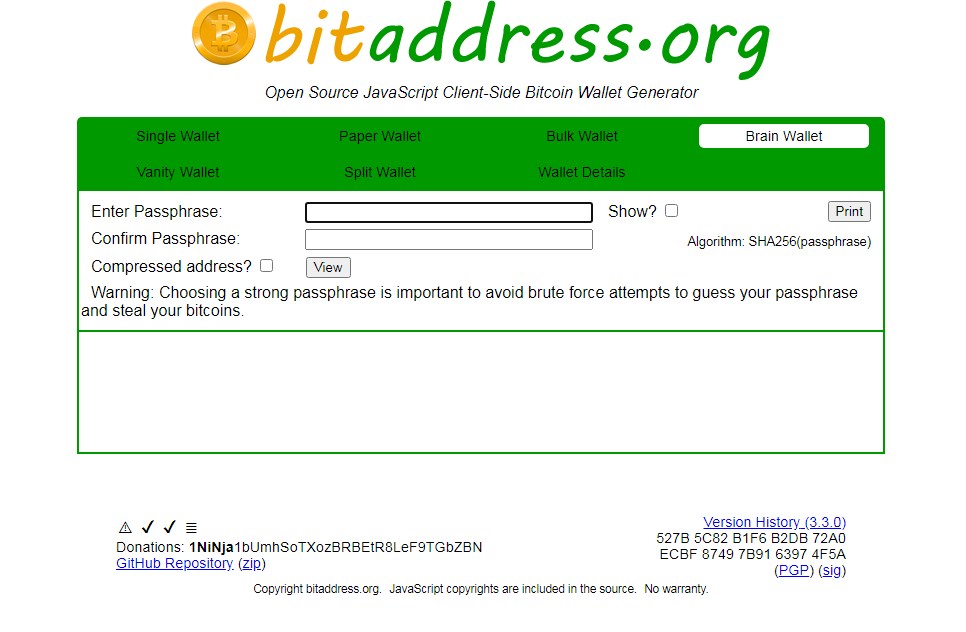
The Brain Wallet option is a simple way to create enhanced security for your paper wallet. The system uses special algorithms to protect your savings from digital thieves. All you need is to indicate a new passphrase and confirm it in the space provided.
Vanity Wallet

The idea is to generate a pair of keys with a public one to share with other users for coin receiving or transferring. At the same time, a private key can be merged with a complimentary one to guarantee maximum digital security. This is what actually BitAddress Vanity Wallet does.
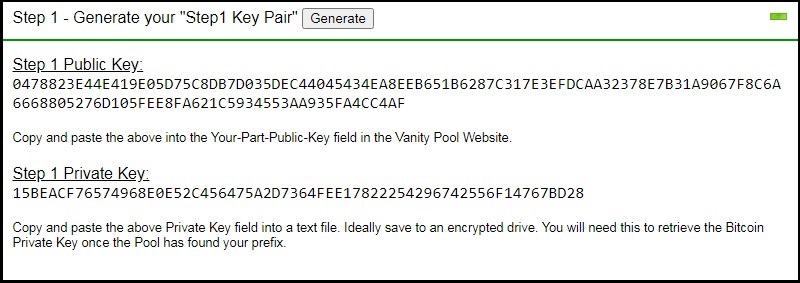
The process is very easy. First of all, you need to generate a private and public key. Simply press the “Generate” button and wait until the data will appear in the spaces provided.
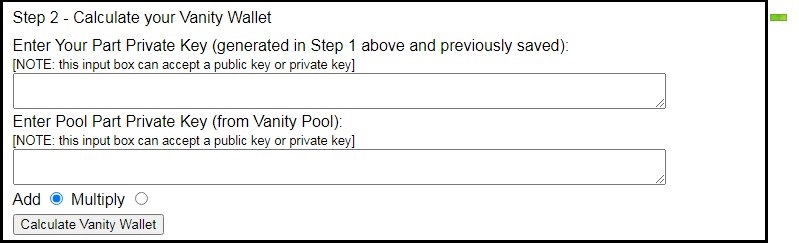
Then type in the keys you have generated during step 1 in the fields located in the next window. Now you may add or multiply the Vanity Wallet and calculate it.
Split Wallet
This one is really amazing, especially for newbies. The feature helps you break the wallet into pieces and keep each of those pieces separately as well as share them with other people.
The wallet will work only when all pieces (shares) are combined in a single window within BitAddress. Users are free to set the number of shares as well as thresholds to combine and enable the wallet.
How to Check your BitAddress Wallet Balance
The simplest way is to go to the Wallet Details. However, it is not a reporting feature with all stats and history highlighted there. It does not show the balance as well as completed or pending transactions. Here you will mainly find system details that have nothing in common with your BTC savings.
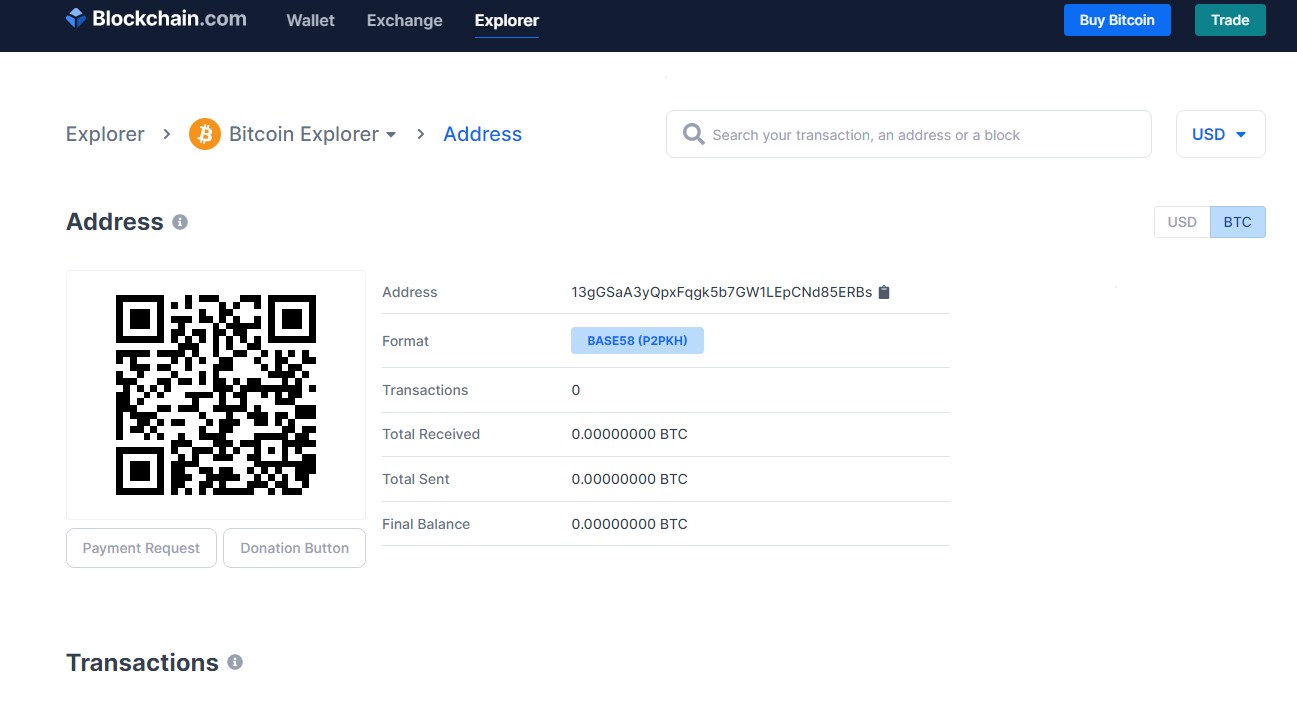
However. There is a simple way to track the balance. All you need is to copy your address and go to blockchain.com. Paste in the address from BitAddress in the space provided and the website will depict the information you were looking for. It includes the amount of Bitcoins spent or received. Here you can also track the transactions and check some other wallet details.
Steps to Reload Paper Wallet
Let’s say you want to send more coins to your paper wallet. In this case, you will need an active online or web-based digital wallet. Indicate the public address we have generated earlier (it is also indicated on the pie of paper you printed).
Now you can send funds to this address and then check if the transaction is complete on blockchain.com.
Steps to Spend Bitcoins with a Paper Wallet
As stated earlier, you will have to sweep between a paper and a digital wallet to spend or transfer coins. Such an approach will help you send funds directly to the online exchange or the digital wallet. We do not recommend sweeping only a porting of your funds. It is always safer to use the available balance completely.
Besides, some of the online wallets and exchange services make it possible to import a private key as well as spend funds from cold storage. Such a feature makes the process even simpler. Unfortunately. Not all platforms come with support for such kind of functionality.
Example: let’s say you need to spend some coins from a paper wallet. The process will include the following steps:
Find a reliable and safe BTC wallet and have it installed on your computer or mobile device.
Enter the wallet and find the “receive” feature. It will be great if it supports QR codes.
Go to your paper wallet to generate the QR code and a private key you will need to complete the transaction.
Send the coins via the code or to the address indicated in your digital wallet.
Additional Recommendations
BitAddress offers one of the safest ways to store cryptocurrency and prevent the risk of fraud. In addition, it comes with more tools to guarantee digital security in the face of split and bulk wallets. However, you can use simple steps to keep your fund away from danger.
First of all, you need to delete the downloaded files and clear the cache after each session. Deleting files may not be enough. Make sure your recycle bin is empty as well. When all manipulations are done, switch your computer off the Internet and reboot it.
Once you have filled your paper wallet with new coins, it is necessary to hide it and keep physically protected. Never show your private keys or avoid sharing them with people you do not trust. A good idea is to keep papers away from the harmful effect of natural disasters or different types of mechanical damages.
The Bottom Line
BitAddress is a simple and safe way to keep your BTC savings away from danger. An open-source system makes it easy and fast to create a paper wallet free without downloads or manual configurations. It comes with additional tools to ensure enhanced coin protection. They include spit, bulk or vanity wallets. Users can generate private and public keys without the need to host them on third-party servers. A user-friendly instrument works great for beginners and experienced users craving for advanced security guarantees.